

OK so now comes the fun part! Laying out and design your own scenes for your Xbox One streams.
If you have yet to link and authorize your Mixer account to Lightstream Studio, make sure to follow this guide first before continuing on.
After everything is setup, it is up to you and your creative talents to put design an eye-catching stream layout. Or is it? If you don't have design in mind or if you don.t have the time to put one together, fear not- Lightstream Studio has plenty of free templates that you can start off with.
This guide will walk you through the process of setting up a pre-built overlay design. I really dig the Mixer themed overlay so lets use that in our example. Once you are comfortable with the process, feel free to experiment with any of the other layouts or you can even venture into create your own design content with the website upload feature.
While you do not need a computer when you are streaming, you will need access to a web browser to do all the setup work.
Head over to Lightstream Studio or click the 'Enter Lightstream Studio' button in your Mixer channel settings in a web browser. Login and authenticate if needed.
CREATING YOUR 'STARTING SOON' SCENE
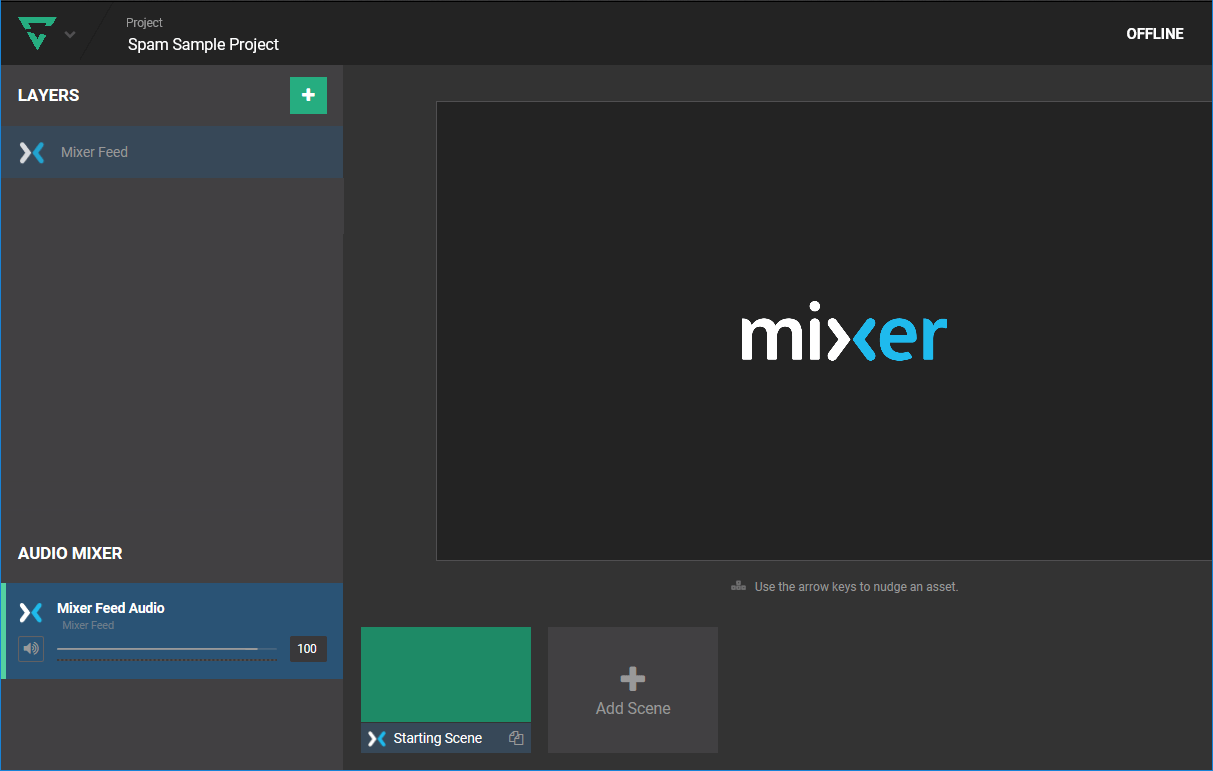
You should be in your 'My Mixer Project' if not, click the top left menu icon - My Projects - 'My Mixer Project'. This is the project that contains your Mixer feed as an available layer so ensure you select this project.
Lets choose our 'Starting Scene' from the scene selection area. Lets take advantage of the 'Starting Scene' and use this as an intro/'starting soon' page. I've discussed this in another article, but a Starting Soon page gives time for viewers to join the stream and there is a sense of anticipation as well.
- Click the '+' Arrow in your Layers section
- Select 'Image'

An Image menu will open up on the left side of the screen. There will be a lot of templates to choose from as well as an upload button for custom design. For this tutorial we will focus on the pre-built Mixer template. Scroll down the Images list and click 'More Overlays >' in the Mixer Overlay section.

Click the 'Mixer Overlays' folder then click 'Select'. Again, lots of pre-built options to explore when you are comfortable setting up your own overlays.

There are multiple options of 'Starting Soon' graphics. If you scroll down you will see a folder containing many more. I like the first one shown so lets click on it and hit 'Select'.

The image will load into your project and will be displayed as a new layer. This layer should be above your Mixer Feed layer as you want. You will also want to mute your Mixer Feed layer so no game audio or sounds are playing during your intro screen. Click the mute icon in the bottom left Audio Mixer corner.

CREATING YOUR MAIN OVERLAY SCENE
Lets add a new scene that will act as your main overlay scene that will be used for your gameplay. You will switch from your Starting Soon scene to this one, once ready.
Click the Add Scene button at the button. I went ahead and renamed my new scene to 'Main Scene'.
- Click the '+' Arrow in your Layers section
- Select 'Mixer Feed' to add your main Xbox display scene.

Lets add your overlay layer next.
- Click the '+' Arrow in your Layers section
- Select 'Images'.

An Image menu will open up on the left side of the screen. There will be a lot of templates to choose from as well as an upload button for custom design. Again, for this tutorial we will focus on the pre-built Mixer template. Scroll down the Images list and click 'More Overlays >' in the Mixer Overlay section.

Click the 'Mixer Overlays' folder then click 'Select'.

Again, there are multiple graphics options for you to experiment with. In this example lets select the first overlay layout then click 'Select'.

The image will load into your project and will be displayed as a new layer. This layer should be above your Mixer Feed layer.

I love the clean, simple look of the layout! You can repeat the steps to create additional Scenes for 'Be Right Back' and 'Ending' Screens. Go through the pre-built graphics again, and you will see multiple options to choose from.
All your progress should be auto-saving as you work so no need to manually save. Once you are happy with your scenes, you are ready to start streaming off your Xbox with your new overlays!
If you would like to take this a step further and add alerts and an alert history event list, head over to this tutorial to add the respective Streamlabs Alert Box and Event List widgets. Just add these are additional layers to this scene.


Your overlays and alerts will always be active once you toggle the 'Send my Mixer video feed to Lightstream Studio' in your Mixer settings via a web browser. If you would ever want to disable Lightstream, just head back to your Mixer channel in a web browser and toggle the button off in your settings. Toggle it back on whenever you are ready to use them once again. Nice and easy!

RELATED MIXER - LIGHTSTREAM STUDIO GUIDES
